Building a Nessus Scanner in AWS Which Sends Scanning Traffic Over a VPN
Setting up client VPN software on AWS EC2 instances in order to anonymize attack traffic can be problematic since you will likely lose your SSH connection upon connecting the VPN. If you want to run Nessus scans for instance against a target while anonymizing your traffic with a 3rd party VPN connection, this is a major hurdle. Proxychains does not work with Nessus, even when using nessusd directly (I tested). Playing with the OS routing table is possible, but if you make a mistake, you lose access. Let me outline a more reliable solution here.
TL;DR Create an SSH tunnel through another EC2 instance to the target instance, because the instance can still receive connections via its private IP address when connected to the VPN.
Let's launch a Nessus scanner AMI and set it up with an openvpn client to PIA. By using the AMI, you won't have to download and install Nessus manually on the instance. Here's the official AMI you'll need:
https://aws.amazon.com/marketplace/pp/B01EHYYYRO?ref=cns_srchrow
In addition, you'll want to setup another instance with the Linux OS of your choice, which will be tunneled through to reach the Nessus instance. This second instance needs to be placed so that it can reach the Nessus instance by its private IP address.
Once you've launched these, you'll want to use an SSH client from your local machine to perform the tunneling through one instance to the other. Here's an example command:
sudo ssh -t -4 -L 8834:127.0.0.1:8834 -i example.pem ubuntu@x.x.x.x ssh -4 -L 8834:127.0.0.1:8834 -i example.pem ec2-user@y.y.y.y
This fun one-liner will connect to the public IP address of the first instance (x.x.x.x) and then tunnel through it to the private IP address of the Nessus instance (y.y.y.y). In addition, it will tunnel port 8834 all the way through, so that you can access Nessus from your local machine via https://127.0.0.1:8834.
Next, you'll need to install the openvpn client on the Nessus instance. The Nessus AMI is built on Amazon Linux, which is similar to RHEL/CentOS/Fedora. So you can install openvpn client like so:
sudo yum install openvpn
In order to connect to PIA's openvpn servers, we'll need to download the appropriate config files. I don't endorse PIA and am quite aware there are concerns with the reputation of the new ownership. On the other hand, for a Red Team exercise, we don't have the same privacy needs as a journalist hiding from an oppressive regime. Here are the commands to get the configs:
mkdir ~/openvpn-configs
cd ~/openvpn-configs
wget https://www.privateinternetaccess.com/openvpn/openvpn.zip
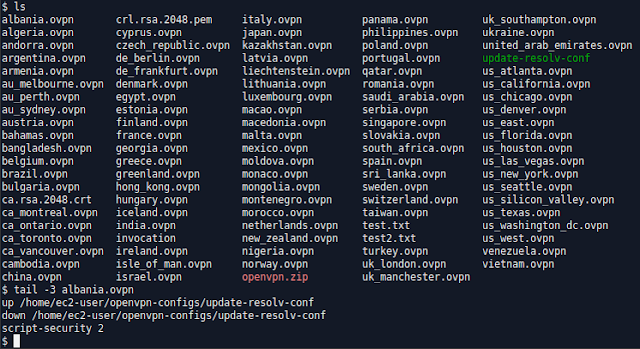
unzip openvpn.zip
There are issues with opendvpn not updating the DNS server in resolv.conf on Amazon Linux (and RHEL/CentOS/Fedora), which kills DNS. These issues can be corrected with a workaround. Running the following commands will append your .ovpn configs to reflect the first part of the workaround:
printf '%s\n' 'up /home/ec2-user/openvpn-configs/update-resolv-conf' 'down /home/ec2-user/openvpn-configs/update-resolv-conf' 'script-security 2' | tee -a *.txt > /dev/null
For the second part of the workaround, you'll need the custom update-resolv-conf bash script which I've tweaked (I'm not the original author). This resolves an issue with /etc/resolv.conf permissions being destroyed, causing DNS to fail without sudo when the VPN disconnects:
cd ~/openvpn-configs
git clone https://github.com/jamesonhacking/update-resolv.conf-custom
sudo chmod u+x update-resolv-conf
Now it's time to do some testing:
screen
sudo openvpn --config us_atlanta.ovpn
Once the VPN is established using your PIA credentials, start another separate SSH session, similarly to before:
sudo ssh -t -4 -i example.pem ubuntu@x.x.x.x ssh -4 -i example.pem ec2-user@y.y.y.y
From this second SSH session, check your public IP address to make sure it is different than what shows in the AWS console:
curl https://icanhazip.com
If that goes well, then it might not be a bad idea to do a very brief Nessus discovery scan against a Burp Collaborator payload, just to make double sure that your IP address is not showing. If that also goes well, you should be ready to perform Nessus scans against Red Team targets!
A few other things to note: Keep in mind, this isn't a perfect solution without further tweaking, because if the openvpn connection goes down, the IP address of your Nessus instance will be revealed. Also, using a VPN with Nessus isn't ultimate, from a performance standpoint, even if it is useful to Red Team. When scanning over a VPN, you may get this warning from Nessus, which is probably good advice:
Network congestion detected
Reduce 'max hosts' to a lower value - Increase the 'network read timeout' in your policy
References:
https://riseup.net/vpn/vpn-red/update-resolv.conf
https://surfingthe.cloud/usable-openvpn-in-centos-fedora-rhel/


Comments
Post a Comment